|
Database Assistant Quick Start
|

1.
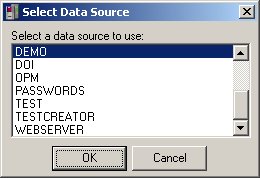
After starting the Database Assistant application, select the data source
that corresponds to the database that you want to review from the list of system
data sources. The system data sources are those that are defined for your
computer via the ODBCAD32.EXE application.
Note: Only Microsoft Access, SQL Server, Oracle, and
Informix databases are currently officially supported. Some DBase
databases may also be compatible.
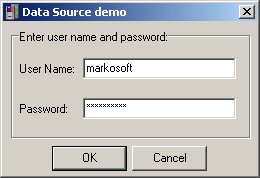
2.
At the prompt, enter the user name and password for the database
corresponding to your data source if applicable.
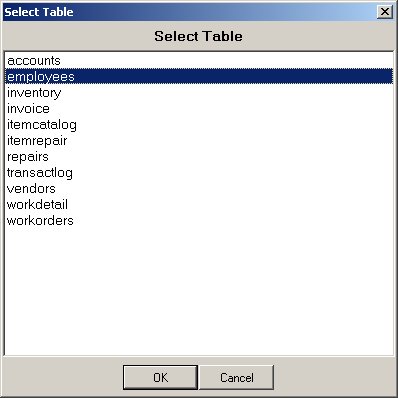
3.
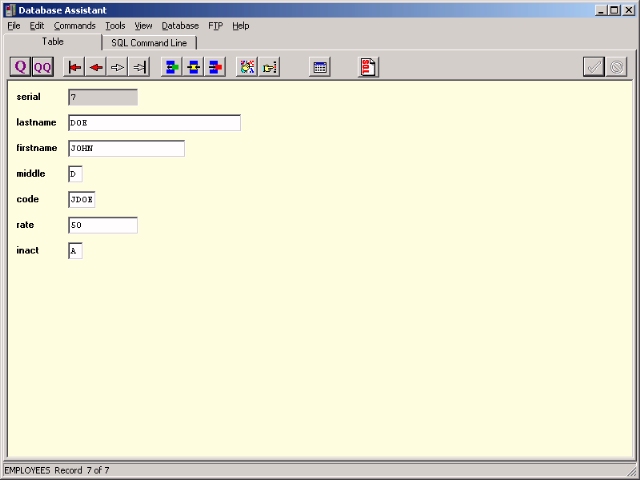
After the main screen opens, click the Select Table button
 located on the menu bar or choose the
Select Table menu option from the Commands menu. Once the
dialog screen opens, choose the table you want to query or edit
and click the OK button.
located on the menu bar or choose the
Select Table menu option from the Commands menu. Once the
dialog screen opens, choose the table you want to query or edit
and click the OK button.
4.
Use the Query
 ,
Add
,
Add
 ,
Update
,
Update
 , and
Remove
, and
Remove
 buttons to invoke the various data
manipulation operations.
buttons to invoke the various data
manipulation operations.
The Execute
 button
is used to commit an operation and the Cancel
button
is used to commit an operation and the Cancel
 button
is used to abort an operation.
button
is used to abort an operation.
The First
 ,
Previous
,
Previous
 ,
Next
,
Next
 ,
and Last
,
and Last
 buttons are used to navigate through the records in the query list.
To perform specialized queries you may use wildcards in the fields. To learn how to optimize your queries
by using special characters go to Using Wildcards in Queries.
buttons are used to navigate through the records in the query list.
To perform specialized queries you may use wildcards in the fields. To learn how to optimize your queries
by using special characters go to Using Wildcards in Queries.
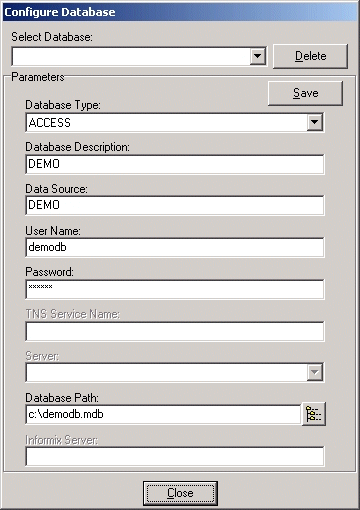
5.
To avoid having to log into a database at program startup and to make a database available in the
Database drop down menu
for quick access, you may pre-configure databases by supplying the information necessary to connect
to each database in advance.
If you haven't chosen the Alter ODBC Registry Information option in the
Edit Options screen, all you need to enter in order to configure
a database is the Database Type, the Data Source, a Database Description, and the
User Name and Password for the database.
If you have chosen to use the Alter ODBC Registry Information feature, you will be required to enter more data and
the information that is required will vary based upon the database type of the database being configured. For example,
an Oracle database will require a TNS name, while an
Informix database requires a listing for the Informix Server.
Depending on the database type selected, some of the boxes will be disabled because they may not be relevant to the
selected database type.
Once all of the required information has been entered, click the Save button. The new database will then be saved into the
Database drop down menu on the main screen.